A Beginner Bloggers’ Guide to Google Analytics

We hope you’ve heard of Google Analytics, because this may just be the most powerful tool in any blogger’s arsenal. It can help you improve your blog content, increase your traffic and be better at social media, and in a series of blog posts here at CollectivEdge we’re going to show you how.
Google Analytics is a totally free tool that tracks everything happening on your website. Every time one of your readers opens one of your blog posts, it will track where they’re from, how they found it, how long they spend reading it, whether they go on to check out more of your blog and much more.
You can use this to find out everything from which topics your readers love most, to which social media networks are sending the most new readers your way.
Today, we’re going to walk you through the boring but essential step of setting up your blog’s Google Analytics account and then give you a brief overview of what’s inside.
How to link your blog with Google Analytics
First, head here to create your Google Analytics account. You’ll need a Google account which you can create here, but if you use Gmail, YouTube or another Google service you’ll already have one of these and can just log in with those details.
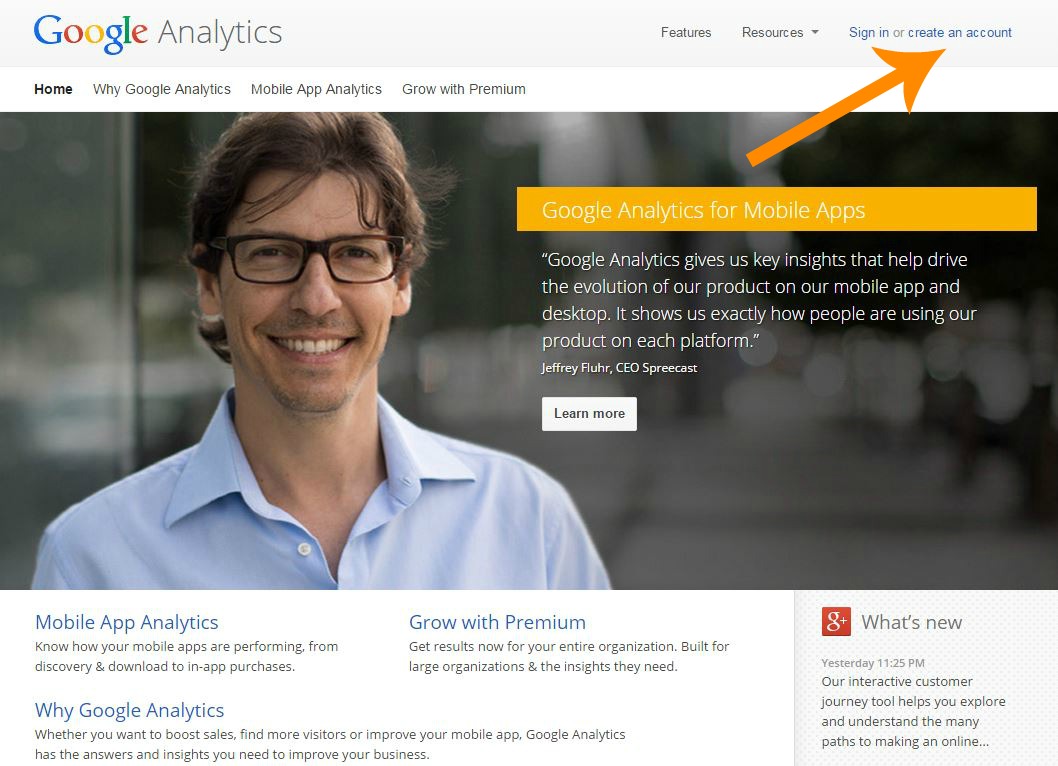
Go to Admin > Tracking Info > Tracking Code to find your tracking ID (it’s a string of numbers with UA at the start) and tracking code (the bunch of html code below it).
![]()
If you’re a hosted WordPress user, unfortunately you won’t be able to use Google Analytics. WordPress does have a built-in analytics tool but it’s not as in-depth or useful, so you may want to consider becoming self-hosted.
If you’re a self-hosted WordPress user, you can install this plugin that allows you to simply enter your tracking ID and you’re good to go.
If you’re a Blogger user, go to Settings > Other and you’ll find a box at the bottom of the page to enter your tracking ID.
If you’re a Tumblr user, your template may allow you to enter your tracking ID in the Appearance section of your Customise Theme page. Otherwise, follow their handy instructions here.
If you have a custom-built website, you’ll need to use the tracking code rather than the tracking ID, and pop this into your site’s html anywhere between the <head> and </head> tags – this makes sure it’s on every page of your website, so it tracks every visitor no matter what post they’re reading.
Phew! That’s the boring – and the most difficult – bit over and done with. Now you’re ready to start using Google Analytics and we promise it’s easy peasy from here on out. Just note that although it will start tracking immediately, it may be a few hours or a full day before Google Analytics updates, so you might need to come back to it tomorrow to check out the features below.

When you’re logged into Google Analytics you’ll see a menu on the left-hand side. It’s full of snazzy stuff and pros can do all sorts of complicated and exciting things, but as a beginner there are three main bits we recommend you start using first:
The Audience Menu
This bit tells you all about your audience – you know, the people who actually read your blog.
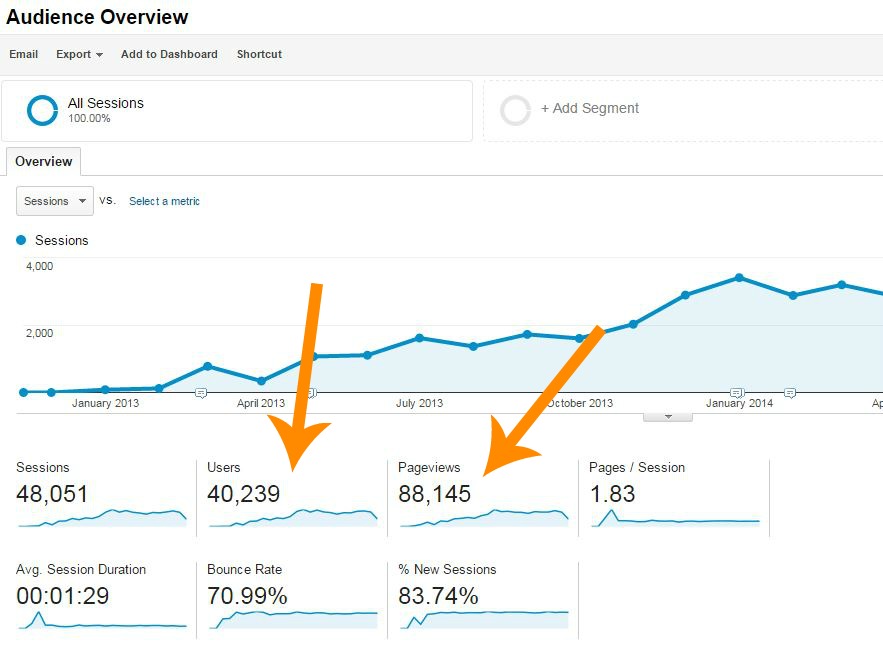
In the sub-menu, you can click on Overview to see how much traffic you’ve got. ‘Users’ is how many individual people have checked out your blog, and ‘Pageviews’ is how many pages have been looked at. So if one person reads three of your blog posts, that would be 1 user and 3 pageviews.
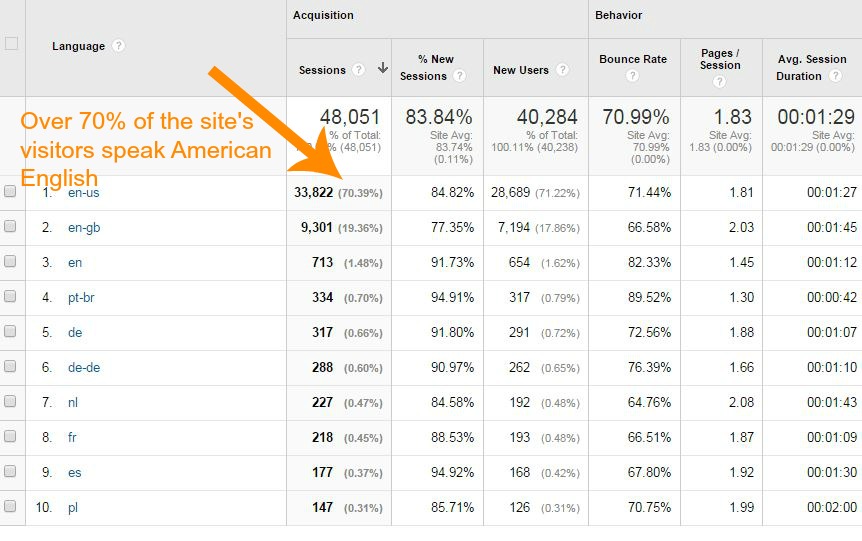
Geo > Language shows you which language your readers speak. It’s all done in abbreviations, so for example ‘en-us’ means US English and ‘en-gb’ means British English.
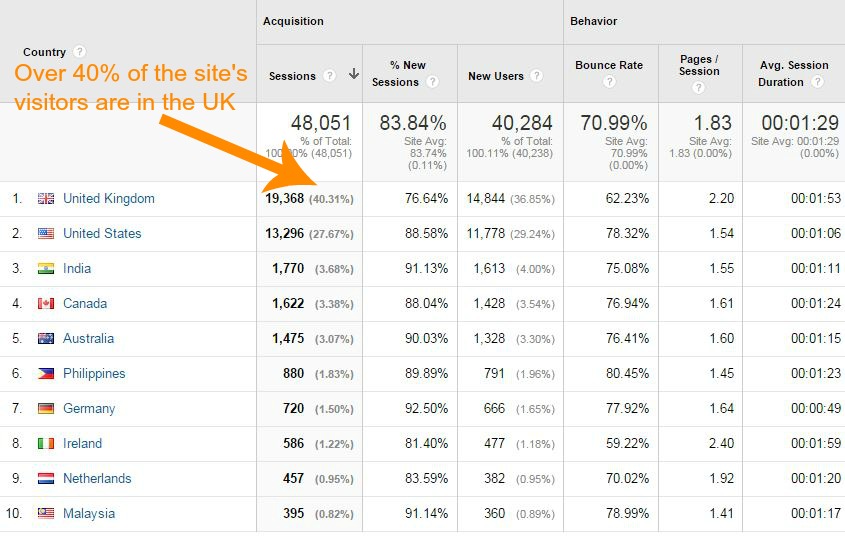
 Under Geo > Location you can see where your visitors are physically located. You’ll probably be surprised at how many aren’t in the same country you’re blogging from!
 Under Behaviour > New Vs Returning you’ll see how many of your visitors are on your website for the very first time (New) and how many are die-hard fans coming back for more of your awesome blog posts (Returning).

The Acquisition Menu
This is a fancy title for ‘where your visitors actually found your site from’. The Channels sub-menu splits these sources down into 4 main places – social (social media), referral (they clicked a link on another website that took them to yours), direct (they typed your blog URL into their search bar, clicked a link in your newsletter or had your blog bookmarked and got to it that way) and organic search (they found your site in Google or another search engine).
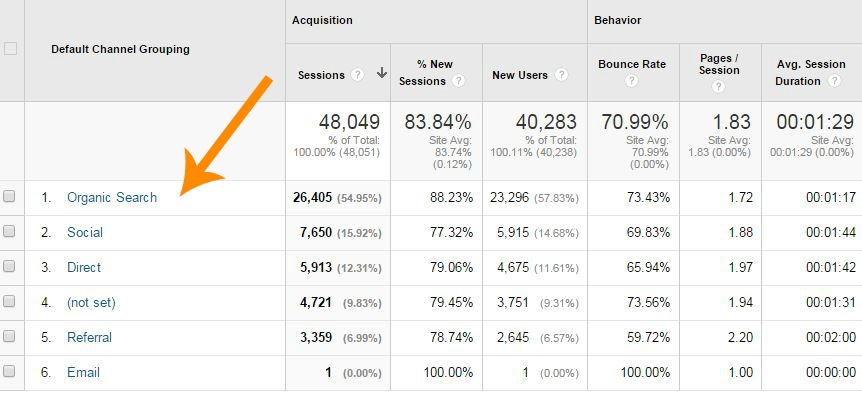 If you click on Social here, you’ll see exactly which site they found you on, like Facebook or Twitter. The same with Referral – click it and you’ll see which blogs or website are sending lovely visitors your way!
 If you click Organic Search, you’ll see what they typed into the search engine to find you – but due to privacy reasons Google now hides most of this information so you’ll probably find your top result is ‘(not provided)’. And if you click Direct, you’ll see which page your visitor went straight to, but there’s more on that in the next bit…
The Behaviour Menu
This is the really exciting stuff! Here is where you’ll find out exactly what your readers are doing on your blog – which posts they’re reading, how long they’re sticking around for and more.
Under Site Content > All Pages you’ll see how often your blog’s pages – including blog posts and things like your homepage and about page – have been viewed. An easy way to see which of your blog posts are really popular!
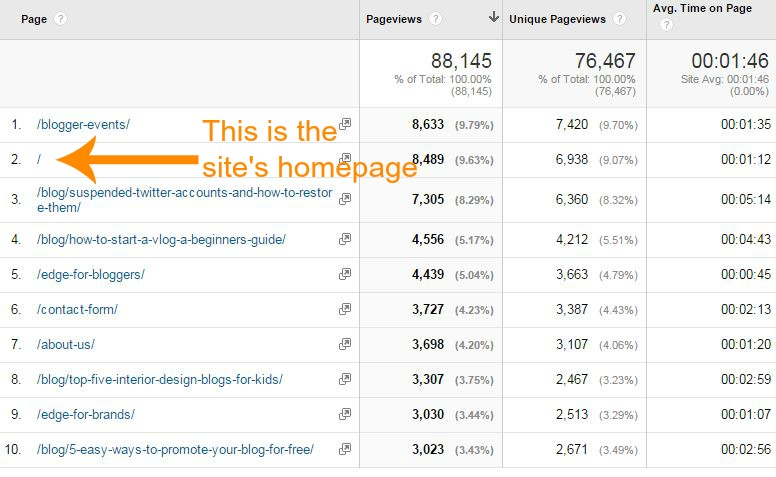 Only the part of the URL after your blog’s domain name is shown, so the one that is just a slash on its own means views of your blog’s homepage.
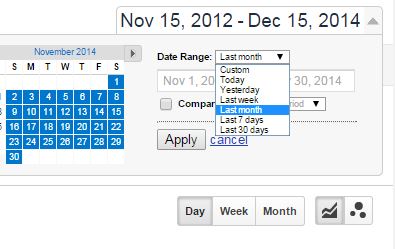
Handy hint: In the top, right-hand corner of Google Analytics you can set the date range, so you can see your stats for today, the past week or all time ever.
We hope this has helped you to get started using Google Analytics, and we’ll be back soon with more posts on how you can use it to your advantage, to create better content and grow your readership.
Do you have any questions about getting set up? Ask away and we’ll do our best to help.


Leave a Reply