How to Schedule Instagram Posts in Hootsuite
Whether you’re a food blogger scrolling to find a new recipe idea or a fashion blogger using it to discover the latest trends, we all know and love Instagram. However, what you may not know about Instagram is that you can now schedule in your next update using Hootsuite.
If you’re a busy blogger scheduling should be your blogging best friend, and if so we’re sure you’ll be familiar with the almighty Hootsuite. But don’t fear if you’re not very scheduling-savvy because without further ado, let us present our handy guide to scheduling your fabulous Insta-snaps with Hootsuite!
Step One
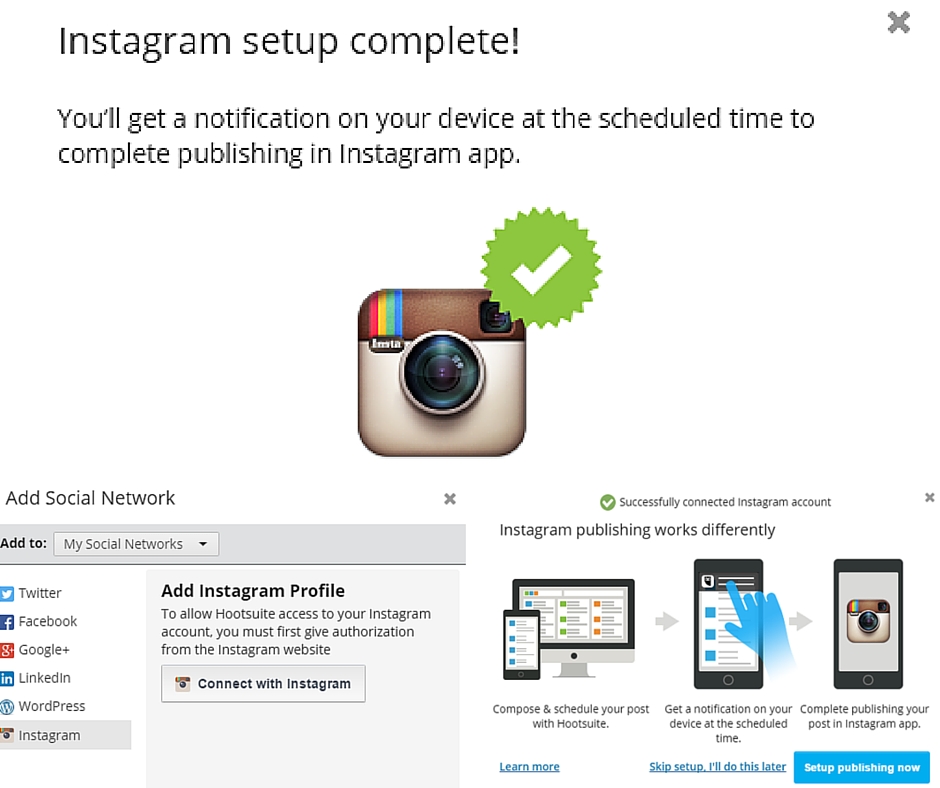
What is Hootsuite? If you’re not familiar with the tool then where has it been all your life!? Hootsuite is a tool designed to make your life a hell of a lot easier. With it you can bulk schedule updates across all your social channels, set them to post at optimal times, and manage all your social profiles from one screen. You can create either a free or paid account depending on your needs.
Once you’ve set up said Hootsuite account, adding your Instagram is easy. Simply click through your profile photo to bring up an account overview then click add social network > connect your Instagram account > setup publishing. To set up publishing you have to ensure you have the most recent download of the Hootsuite app, you will also have to give permissions for the app to send through push notifications – this will all be made clear why in step three.

Step Two
Now that you’re all set up and ready to go, compose your desired Insta-post as you would any social message in Hootsuite. Obviously don’t forget to click the attachment icon to upload that all-important image (don’t worry, you can apply those even-more-important filters later). It’s worth noting that any URLs you add won’t be hyperlinked when they come to publish on Instagram, so having your blog link in your profile bio is vital for driving traffic to your posts.
Schedule your messages in for the desired time by simply clicking the calendar and choosing exactly when you want it to go out, alternatively you can auto-schedule your message for optimal impact when most of your following are online.
Step Three
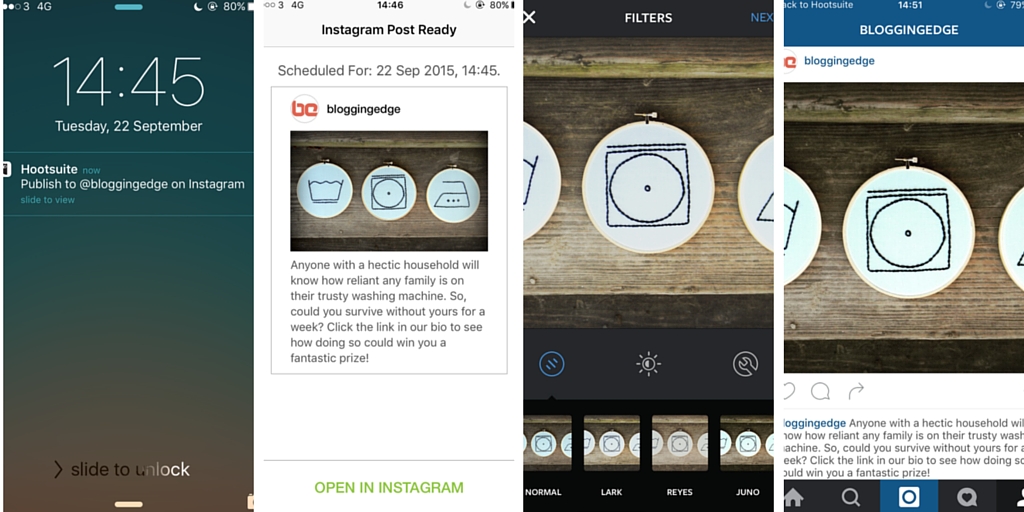
Whilst you compose and schedule these messages into Hootsuite, you will need to publish directly on Instagram yourself. As we mentioned in step one, you will receive push notifications on your phone when your scheduled post is ready to go live.
The next step is simple, open notification > review your post > open in Instagram. Hootsuite will automatically copy your description to the clipboard. All that’s left for you to do is scroll from Lark to Nashville to find your favourite filter, paste your text, add those tags and location and hit share!
And that’s that!
Engaging
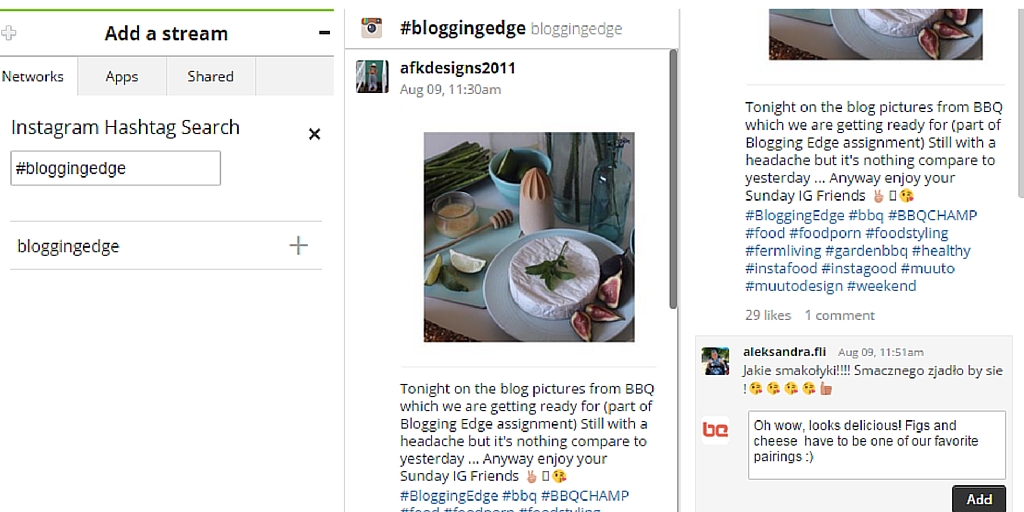
Hootsuite isn’t only for scheduling your snaps, it’s also the perfect place to engage with your readers in one compact screen. Simply toggle + in the bottom right corner and add your desired ‘stream’. You can set up them up for pretty much everything from followers and likes to hashtag searches and location searches with just a few clicks of a button.
A few fun additional features mean that you can re-share, save and better yet, zoom in on other people’s Instagrams without that awkward accidental liking that we know we’ve all done (don’t deny it!).
Hopefully now with our help – and Hootsuite’s – you’ll never miss a prime opportunity to post a fabulous snap again with scheduling.
Has this guide been helpful for you? Will you be using Hootsuite to schedule your next Instagram photo? Let us know in the comments below!



Leave a Reply